Sunday, 30 June 2019

Raspberry Pi 4

My Pi 4 is on the way ... 

Few thoughts 

I dropped Raspberry porting for QNX/WinCE for many reasons 

1.Lack of IO support ( UART/SPI/I2C)
2.Designware USB rather than having standard open host 
3.Ethernet on USB 

These concerns are addressed in the  Pi4 ..  

I dont have any plans to restart it , Lets see.. 

I am slowly moving in to AI ..  I know something is lacking on  the existing AI's ... I am coming there to fix it ..  

Sunday, 13 January 2019

plans for 2019 - Chrome

have been going through the early development notes of chrome.. its a wonderful platform. chrome browser has its own OS.. its has its own rendering engine ... Node.JS is one of the finest product came out of chrome's blink browser engine .
Planning some development work on this platform. I know ,an army of ppl involved in this, will stay away from the crowed .

plans for 2019

'pkgsrc' supports around 20000 packages and a wide range of OS. it was Originally developed by NetBSD. its proven to work on self hosted QNX X86 machines ..attempting to check pkgsrc support on QNX ARM platforms ,Notable packages under pkgsrc are apache , mysql, PHP, python .

attempting linux port to esp32 , the one with SPI 4MB RAM. the most attractive part of esp32 module is , its cheap and hand solderable . its architecture(Xtensa) has got the mainline kernel support .. probably the drivers need to be added.

similar like esp32 , allwinner v3s board, 1GHz ,Cortex A7 , comeswith buildin 64MB RAM .. with this a single sided PCB can power ON the processor . no hectic impedance matching is required.. its very cheap (3$) and it comes with hand solderable lqfp package.

Monday, 8 October 2018

QNX /WinCE Porting Journey

Its been 4 years ... It started with a simple question.


 First target was Raspberry . Initial 3 things are necessary  for porting to any OS , 1- Timer 2-UART(just to see whats happening inside the board ) , 3- Interrupt ,normally, the trouble comes with interrupt, load address has to be mapped with boot address properly. I ran into multiple problems in the process.So with no choices left out, ordered Beaglebone(4000Rs) , which is very well supported by QNX.


BBB QNX bsp had no HDMI graphics support .. It can be wiredup with 24X parallel LCD , that  requires additional module & LCD.. I didn't like to spend another 4000Rs on that ... Initially graphics driver was very challenging, later figured out the way to do it. 


Then I came back to raspberry to fix the graphics, In this process ,I found that Photon ,’ the famous QNX UI’ is not supported on ARM version. really I did not expected this .. Instead they were promoting QT. dont know the logic behind this decision .. Technically if photon can run on x86 , it should be possible to make it run on ARM .  Ideally what I wanted was, to move X86 Application code to ARM , which would save probably 400$ to 600$  hardware cost. porting an app from Photon to QT , is something a hell of job .. instead you could rewrite it from scratch ... yes ..First door closed..  I lost my interest on continuing further on this direction..   If Photon was open source, It could have been easily ported to ARM.( QNX guys still keep the ARM version of Photon library , but it crashes immediately )

 Second Raspberry’s Network chip on USB, is something ,as a person from hardware & software background  , I couldn’t digest it .  One could make an Ethernet IP core out of 20K LUT  which probably cost them additional 20cents… Seriously I cant still believe that how they carried away with their decision. Linux driver development is different, you have an army of developers who are ready to spend their day & night for a little pride. That’s not the case for other OS. 

I still have a mouse/keypad/Ethernet baremetal code (well someone did a nice job), which is in C++ .  most divers don’t support C++ .. Someone has to spend another 15 days to make it pure C code . which is another hell of work.. again the success rate is 50 :50 .. No time/ patience to do that. 

QNX graphics is consuming a huge CPU cycle.  Well I wanted to add GPU support , even spent some time on “Lima”  library .. I even  thought of tweaking it .. well ,mali GPU is a closed source library  ,’ Lima ‘guys were trying to reverse engineer it..    Another best method  is making a  wrapper around Linux Mali library  .. I know the complexities.. Linux /QNX  library loading mechanism /file format / function loading/ kernel support  everything is different . but since linux is open source , it should be possible to make it …  one can’t take these kind of work without QNX team support.   Another Door is closed. 


Some one did a nice job on raspberry  porting to WinCE(very basic)..  I wanted to add USB mouse & Keyboard support .. I had a baremetel code for that , but WinCE compiler was very older than the one my code was targeted for…  spend some days on that , don’t want to procced further on that.

 Next I was searching for something cheaper than raspberry, but with proper Network & USB hardware support … there Orange Pi came. I have QNX 6.5 & WinCE 7   , at the time these software were released ,no quad Core ARM Cortex was born.. The compiler is very old , not all the multi core instructions are supported.  

Lessons
1.   Always strict to open source (especially for something you do it as a hobby)
2.   Choose the best hardware or stay close to the well supported OS
 

will continue to do FreeRTOS porting .  Well  I am cleaning the Orange Pi code..  will release the basic code in a week .

Sunday, 6 May 2018

Raspberry Pi3 FreeRTOS

Raspberry Pi3 FreeRTOS  is out ... 

https://github.com/varghes/Raspberry_Pi3_FreeRTOS

Single core is running ..    

All set to add QNX & WinCE Support ..

Sunday, 11 February 2018

UART 2M Baud rate experience

UART is a terrible protocol , be carefull while considering it for higher data transfer . There are bottlenecks everywhere hardware /software /driver /buffer .. which includes even if you have a flow control in place . .. I had earlier serious data loss, attempted everything to stop it . changed timeout / added flow control .. overlapped read write to normal ...   now no loss


tested using CH340G    (timeout can be adjusted to get 1000polls/sec) , loop back method (tx/rx  connected)  64byte per transfer   (CTS/RTS connected)

Experiment 1:

9600 - 15 polls /sec - no loss
14400-  23 polls /sec - no loss
19200-  30 polls /sec - no loss
38400-  56 polls /sec - no loss
57600-  88 polls /sec - no loss
115200-  174 polls /sec - no loss
128000-  190 polls /sec - no loss
230400-  334 polls /sec - no loss
460800-  650 polls /sec - no loss
921600-  1120 polls /sec - no loss
1500000-  1593 polls /sec - no loss  (removed CTS/RTS(both software & hardware) & checked ,no effect )
2000000-  30 polls /sec - loss started  ...  it looks like loss is because of TX completion , afterwards RX starts ,since single device used . otherwise if I use 2 devices , I guess it should be fine.

Experiment 2:  2 USB-UART devices 

1500000-  666 polls /sec 
2000000-  loss

64*666x 8bits= 340.992Kbps ( both directions )

Experiment 3:

Added 2 threads , one for reception & other for Transmission .. Reception hanged , may be it requires some sort of synchronous .  even if I add 1ms delay , it looks like I cant achieve more than 660 polls 


Experiment 4: 128 bytes per cycle 

1500000-  804 polls /sec - no loss  - reduced to half

Experiment 5: 512 bytes per cycle 

1500000-  230 polls /sec - no loss  - reduced to half 
8x230=>1840 
1840x64x8=942,080  => comes close to 1Mbps
(provided data readily available from controller, otherwise it would cause further delays )

Experiment 6: 1024 bytes per cycle 

1500000-  117polls /sec - no loss  - reduced to half 
16x117=>1872
1872x64x8=958464  => comes close to 1Mbps


Experiment 7:  cp2012 :1024 byte

1500000-  130polls /sec - actually this buad rate is not suppose to work as per their spec
2000000-  130polls /sec
3000000-  130polls /sec
4000000-  130polls /sec (dont know what the fuck is happening with this chip)
6000000-  130polls /sec (no CRO here)
12000000-  130polls /sec (haa haa thats almost protocol speed)
921600 - 83 polls/sec ( back to normal)


Experiment 8:  cp2012 :512 byte

1500000-  250polls /sec - 
921600 - 156polls/sec


Experiment 9:  cp2012 :64byte

1500000-  990polls /sec -  wow matches to 1ms 

921600 - 565polls/sec
460800-  500polls /sec

990x64x8=506.880kbps


Experiment 10:  FT2232D :64byte 

460800-  104polls /sec , mummy ...I am pretty sure this is something related to FTDI timeout. Stoping this experiment here , because its simply waste .

ft2xx command mode 
3000000- 3615polls/sec  -  FTDI is always the master , you could tweak anything & make  it work 
for your application.   poll is beyond the limit , let me connect it to other port 

now reduced to 2200 

2200x64x8= 1.12Mbps


Experiment 11:  FT2232H :64byte High Speed

command mode 
3000000-4770 polls 
12Mbaud-17,000 polls/sec another port it is 7899 polls /sec , close to theoritical calculation 8000


here too , in Serial mode , still has some timeout issue ..


end of research


Tuesday, 19 September 2017

QNX-QT-Apps

Project is hosted on my github

https://github.com/varghes/QNX-QT-Apps

Collection of QT applications compiled for QNX

1. Text Editor
   tea
2. File Manager/ Explorer
   qtFileManager
3. Calculators
   calc ,scicalc
4. Games
   chess-qt ,Freecell ,soft336PacmanGame ,BlackJack ,QtLianliankan
   QtMineSweep, multiSnake, QtTetris, snake, solitaire

"exe" folder contains the executable file (Compiled against QNX 6.5 ARMV7)
"image" folder  contains the app final image

QT QNX Installation , refer my other repository
https://github.com/varghes/BeagleboneBlack-QNX-QT

Compilation : (on Windows )

1. open command line  "Cmd"
2. "cd" Change directory to the application directory (.pro )
3. qmake -spec unsupported/qws/qnx-armv7-g++
4. make


Debugging

1.Create Debug version of application
 .pro file  add this on Top

 CONFIG += qt warn_on debug
    debug {
        TARGET = myappdebug
    }
    release {
        TARGET = myapp
    }

2. qmake -spec unsupported/qws/qnx-armv7-g++ CONFIG+=debug
3. make CONFIG+=debug


QNX IDE Changes For Debugging

1.debug configuration-> Environment variable
add this environment variable
 TMPDIR=/ramdisk
 XDG_CONFIG_HOME=/ramdisk

2.compile using commandline , Debug using IDE


 .build File Changes

 1. Copy the executable file to
    prebuilt\armle-v7\sbin
 2. make the script file changes

[+raw perms=+x]calc
[+raw perms=+x]chess-qt
[+raw perms=+x]Freecell
[+raw perms=+x]soft336PacmanGame
[+raw perms=+x]BlackJack
[+raw perms=+x]qtFileManager
[+raw perms=+x]QtLianliankan
[+raw perms=+x]QtMineSweep
[+raw perms=+x]multiSnake
[+raw perms=+x]QtTetris
[+raw perms=+x]scicalc
[+raw perms=+x]snake
[+raw perms=+x]solitaire
[+raw perms=+x]tea

/usr/bin/calc=calc
/usr/bin/chess-qt=chess-qt
/usr/bin/Freecell=Freecell
/usr/bin/soft336PacmanGame=soft336PacmanGame
/usr/bin/BlackJack=BlackJack
/usr/bin/qtFileManager=qtFileManager
/usr/bin/QtLianliankan=QtLianliankan
/usr/bin/QtMineSweep=QtMineSweep
/usr/bin/multiSnake=multiSnake
/usr/bin/QtTetris=QtTetris
/usr/bin/scicalc=scicalc
/usr/bin/snake=snake
/usr/bin/solitaire=solitaire
/usr/bin/tea=tea


License :

Please refer the individual project License Terms


BlackJack

calc 

Chess

Freecell

multisnake

File Manager

Chinese App

Mine sweep

tetris

Scientific Calculator

Snake

Pac Man

Solitare

tea Editor 


Friday, 1 September 2017

beaglebone black - QNX QT


                  Unlike Raspberry ,beaglebone (AM335X) has a very good documentation , also it has got a very good SDK support which makes porting to any OS is like a cake walk. 
QNX support is already there for this board. only problem is display wont work . It has got some hdmi code , probably thats for some old beaglebone version.  

If you use LCD Cape , please use the original code from QNX site . My focus is only on HDMI & QT .I dont have LCD Cape.


If you want to learn QNX  / If you want work on QNX for the first time, buy this board & use this  BSP ,it has got all the drivers plus graphics /QT support. beaglebone board price is 55$ something last time when I checked. I hate buying bsp from third party vendors, we are paying for QNX , so bsp should be  free , or use the board/processor which has the free bsp support. 


 http://community.qnx.com/sf/wiki/do/viewPage/projects.bsp/wiki/TiAm335Beaglebone

(login required) 

Source Code 

                 
         Source code is maintained here 

            https://github.com/varghes/BeagleboneBlack-QNX-QT

Setup :


Test the board and SD Card First:

        Write any working Linux image to the sd card &  hold the boot button(boot from SD card) , power on , make sure you can see the serial debug messages . 

QT Installation :


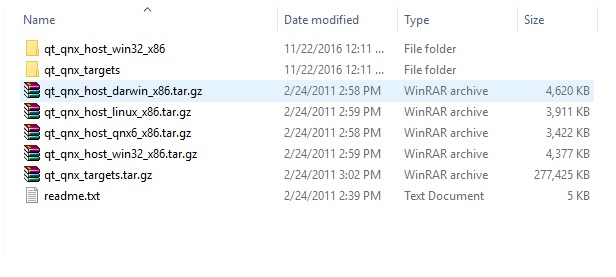
              Installation files are here . 


               https://drive.google.com/open?id=0B02sL8YIqsjCNS1ZWFNkQzRRY0E


this was there in the QNX site.. but now the link is removed  (qt_qnx_2011-02-24b.zip) , they might have thought QT support is beyond their scope. So I have uploaded here in my google drive.  qt got lgpl license. which is fine for distribution.


1. unzip it ... Installation folder contains files for different OS , mine is windows. If you are using linux /other OS use the correct folder.


2. qt_qnx_host_win32_x86 goes to  C:\QNX650\host (mine installed here) , just copy the files only 

    dont copy the  folder /replace the folder 

 qt_qnx_targets\target\qnx6\armle-v7  (both bin & lib also copy the qt4/pkgconfig folder )goes to  

C:\QNX650\target\qnx6\armle-v7

qt_qnx_targets\target\qnx6\usr goes to C:\QNX650\target\qnx6\usr


 Build QT Project :


1.Open The QNX IDE -> File ->New -> QNX C++ Project -> 

     build variants -> armV7 

2.Test application code 


#include <qt4/QtGui/QApplication>

#include <qt4/QtGui/QPushButton>
#include <stdio.h>
#include <cstdlib>
#include <iostream>

int main(int argc, char *argv[]){

printf("Application Running... ");
QApplication app(argc,argv);
QPushButton Button1("Hello World");
Button1.resize(180,90);
Button1.show();
return app.exec();

}


3. Right click on the project -> properties  , check build variants


4. Select Compiler Tab ->  Extra Include path 


Add from -> "Disk"  -  then "apply "


[QNX Directory ] /target/qnx6/armle-v7/usr/lib/qt4/imports

[QNX Directory ]/target/qnx6/armle-v7/usr/lib/qt4/plugins
[QNX Directory ]/target/qnx6/usr/include/qt4


5. Linker Tab 

category  "Extra library  "  click "Add"     and type
            QtGui
            QtCore
click "apply "  , click "ok"   , Now "build project" can compile the QT source code.


qnx executable image can be found here  , in the project folder . arm\o-le-v7


.build scripts changes 

 BSP files are here  ... as usual 

a. unzip it  b.create an empty project c. File -> import ->General ->Existing Projects in to Workspace -> File system (select the unzipped folder ) -> build 


#QT requires a RAM File sytem

#QT directory 
     devb-ram ram capacity = 8192 &
     waitfor /dev/hd1  
     dinit -q -h /dev/hd1t77
     mount  /dev/hd1t77  /ramdisk

#environment variables 

       QWS_KEYBOARD=qnx
#QWS_MOUSE_PROTO=qnx
#QWS_MOUSE_PROTO= qnx:/dev/devi/ touch0
QWS_MOUSE_PROTO=qnx

TMPDIR=/ramdisk
XDG_CONFIG_HOME=/ramdisk
QWS_DISPLAY=qnx

#dont start photon 

     display_msg Starting graphics driver
     io-display  -dvid=0,did=0
     waitfor /dev/io-display 2

#usb mouse Keypad 

io-hid -d usb -v &
mount -Tio-hid devh-usb.so
devi-hid -Pr -vvv mouse kbd  &

# finally run the application with this 

qt_v7_demo -qws &

###########################################################################

## QT Library
###########################################################################
libQtGui.so.4
libQtCore.so.4
libQtNetwork.so.4
libcpp.so.4
libz.so.2
libstdc++.so.6

libhiddi.so.1

devh-usb.so

##########qtdemo dependency############

libQtHelp.so.4
libQtDeclarative.so.4
libQtXml.so.4
libQtSql.so.4
libQtXmlPatterns.so.4
libQtSvg.so.4
libQtScript.so.4
libQtCLucene.so.4

##designer

libQtDesignerComponents.so.4
libQtDesigner.so.4

##browser 

libQtWebKit.so.4

#some qt example applications 

[+raw perms=+x] qt_v7_demo
[+raw perms=+x] browser
[+raw perms=+x] qtdemo
[+raw perms=+x] designer


libQtGui.so.4 , libQtCore.so.4 both are the main libraries  , I have included other libraries to test the qtdemo ,designer , browser  applications

Script changes, Project settings are already done in the BSP  & Example QT project  , So you dont have to make any changes.


if build is successful , you should be able to see the final image 


First QT application should be followed with the command "-qws"

example 
qt_v7_demo -qws &

This window will become desktop window .


Flashing SD Card 


"ifs-ti-beaglebone.bin  " before adding the QT files the the image size was around 15 MB only ..

After QT library additions it becomes 75MB .. if you use the 2 core QT Libraries , you can reduce the image size.

boot files are here 


https://drive.google.com/open?id=0B02sL8YIqsjCWlpRWVVTVWpkZ00


TI_SDCard_boot_utility_v1_0.exe   you can use this tool to copy MLO file  .. under windows 10 ,"run as administrator" mode  .. if you have any issues, use Windows XP ,VMware virtual machine .


If it works , you should be able to see the serial debug message . uEnv.txt usually  directs the control to SD Card automatically .  if doesn't work , while powering ON , hold the boot button( next to usb B connector )


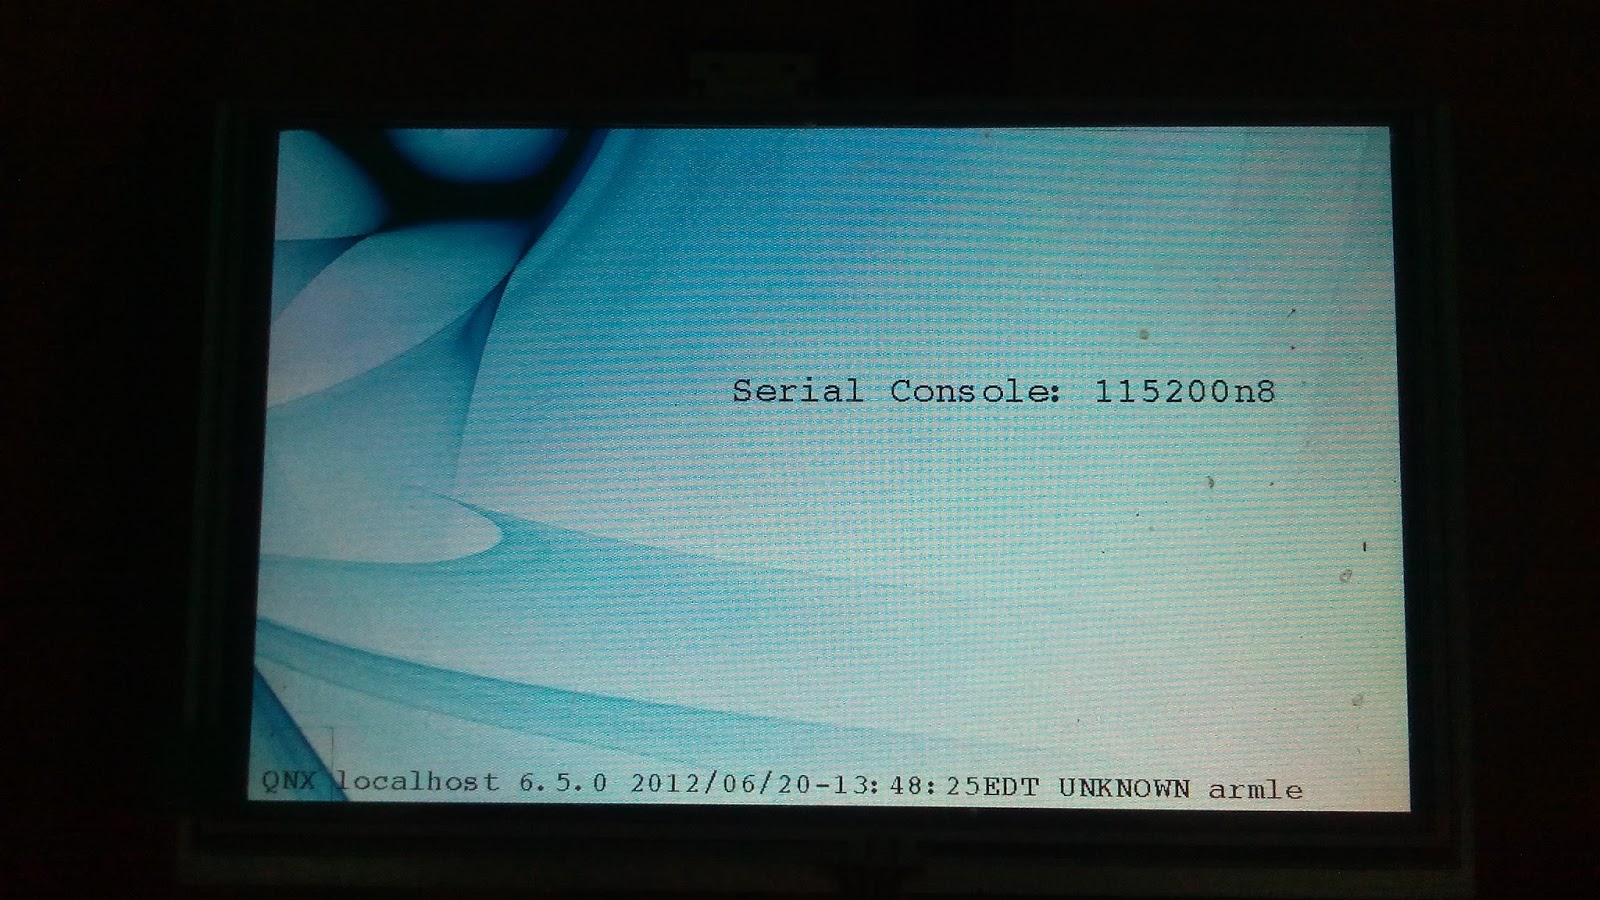
Some of My setup photos  & QT Screen


Form Window

QML Example

QtDemo


 My Setup


So you want to buy me a beer ?  :)  

Wednesday, 16 August 2017

Beaglebone Black -QNX -QT Support

I spent several weeks to workaround beagle bone black graphics (HDMI) QNX support & made some demo programs to run on that ..

It supports USB mouse /keypad /pendrive / HDMI Display/Network /EMMC/UART/SPI/CAN ..

This would be the low cost board 100% supported by QNX ..

It still needs some cleanups , I haven't decided whether I should opensource it /Sell it /ask for some donation.

QT  is much better than Photon windows manager . With QT  ,A whole range of programs Linux programs can be ported to QNX ..

Few clicks ..

{other project "Raspberry QNX" open source project is steadily moving , eMMC Support testing is in progress . soon it will be pushed in to github. next step would be USB..}


3 Applications are running , 1. QTDemo 2.QT browser 3. QT GUI Designer (screen resolution yet to be fixed)

Planning to make/port  a QT based CAN Analyser , which would work on Windows /Linux /QNX.


Testing Video


update : I am making it open source ... will be uploaded soon in my github ... Enjoy ..

Friday, 2 June 2017

Raspberry BCM2835 - uC/OS uC/GUI


Note : This software is given here purely for academic purpose , So Kindly contact sales@micrium.com   , If you decided to use uC/OS or uC/GUI in your product, refer their license terms ..   The work I have done (Raspberry Porting ) is distributed under MIT license ..  This software is given here with the intention that it can useful to learn both these products.  

What is working 

1. Kernel 
2.GUI  
3.You can access  peripherals(I2C/SPI/GPIO ) using Baremetal code
4. SPI-Touch  - planned , but not implemented 
5. USB -Mouse ( included csud driver - not working fully)
6. Repaint of screen requires some fix

Compiling it on Windows 

1.download  gcc-arm-none-eabi-4_7-2013q3-20130916-win32.exe  ( I am using this version)
while installing uncheck environment variable option . 
2.  Go to  C:\Program Files (x86)\GNU Tools ARM Embedded\4.7 2013q3\bin     " gccvar.bat"  run this file .
3. cd "project directory"   then "make " 
4.image size defined here is  uCGUI\Config\LCDConf.h   800x480 , change is according to your screen

Running 

Copy the kernel.img to SD code & replace the existing one .


Code is here 
           https://github.com/varghes/Raspberry-uCOS-uCGUI                 


Sunday, 7 May 2017

stm32f103c8t6 Serial /SWD programming issue


I  had two peculiar programming issues 

1. Serial programming works (Demonstrator GUI ) sometimes  connects , some times it wont . I found a pattern

    a. Set Boot0 jumber to 3.3V
    b. First connect the USB-UART to PC 
    c. Then power ON STM32 device   
      this times it works ...   the other way that is connecting STM32 First & USB-UART Second is not        working 

2.SWD is not connecting  ... (ST Link Utility )

you might have accidentally not selected  Serial Wire Debug option under STM32Cubemx. 
That will disable further debugging  , only option to recover is 

Set Boot0 jumber 3.3V  & program the software that enabled serial Wire debug option.


Thursday, 19 January 2017

Fx2lp - CY7C68013A development board

I am a big fan of USB... I have personally worked on many USB related projects


This was lying on my table for years I did n't know what to do with this board ..
I didn't have the schematic too


Actually this schematics covers all , except those 2 LEDS , They are connected to PA0, PA1 pins 


  1. Install CY3684 EZ-USB FX2LP DVK Setup software
  2. Install GPIF Designer software
  3. Install SuiteUSB software
Here is my Project files , Unzip it 


3  things 

1. Bulkloop Application 
     This is to send data to the device (testing )  .. You can modify this for your final USB PC application development


2. CYControl ( Detect Development Board & Download Firmware in to the device )
      You can use this to download hex file to the device 

3.Keil ( Remember this is size limited version )  ... So people sometimes chose sdcc compiler.( That works better on linux)

Double click & open it ..


Build it .. 


once build is done , use the "cycontrol" tool to download the hex file to the device .. 
I put a small code to blink the led when you send 01 ..(use bulk loop pc application)


For cypress ,no code explanation required :)